Deploy to Render
Deploy your agent platform to Render.
Next, let's take your platform live by deploying it to Render. You'll need a Render account, a GitHub repository and model API keys.
Deploy your platform
Render deploys directly from a GitHub repository. Your codebase comes with a /deploy-platform skill that helps set up your repository and walks you through the process. Run the skill with your coding agent:
/deploy-platformOnce your repository is set up, open the Render dashboard:
- Choose New → Blueprint and select your repository, branch and the root
render.yaml. - Enter your
OPENAI_API_KEYand setRUNTIME_ENVtodev. - Click Deploy Blueprint.
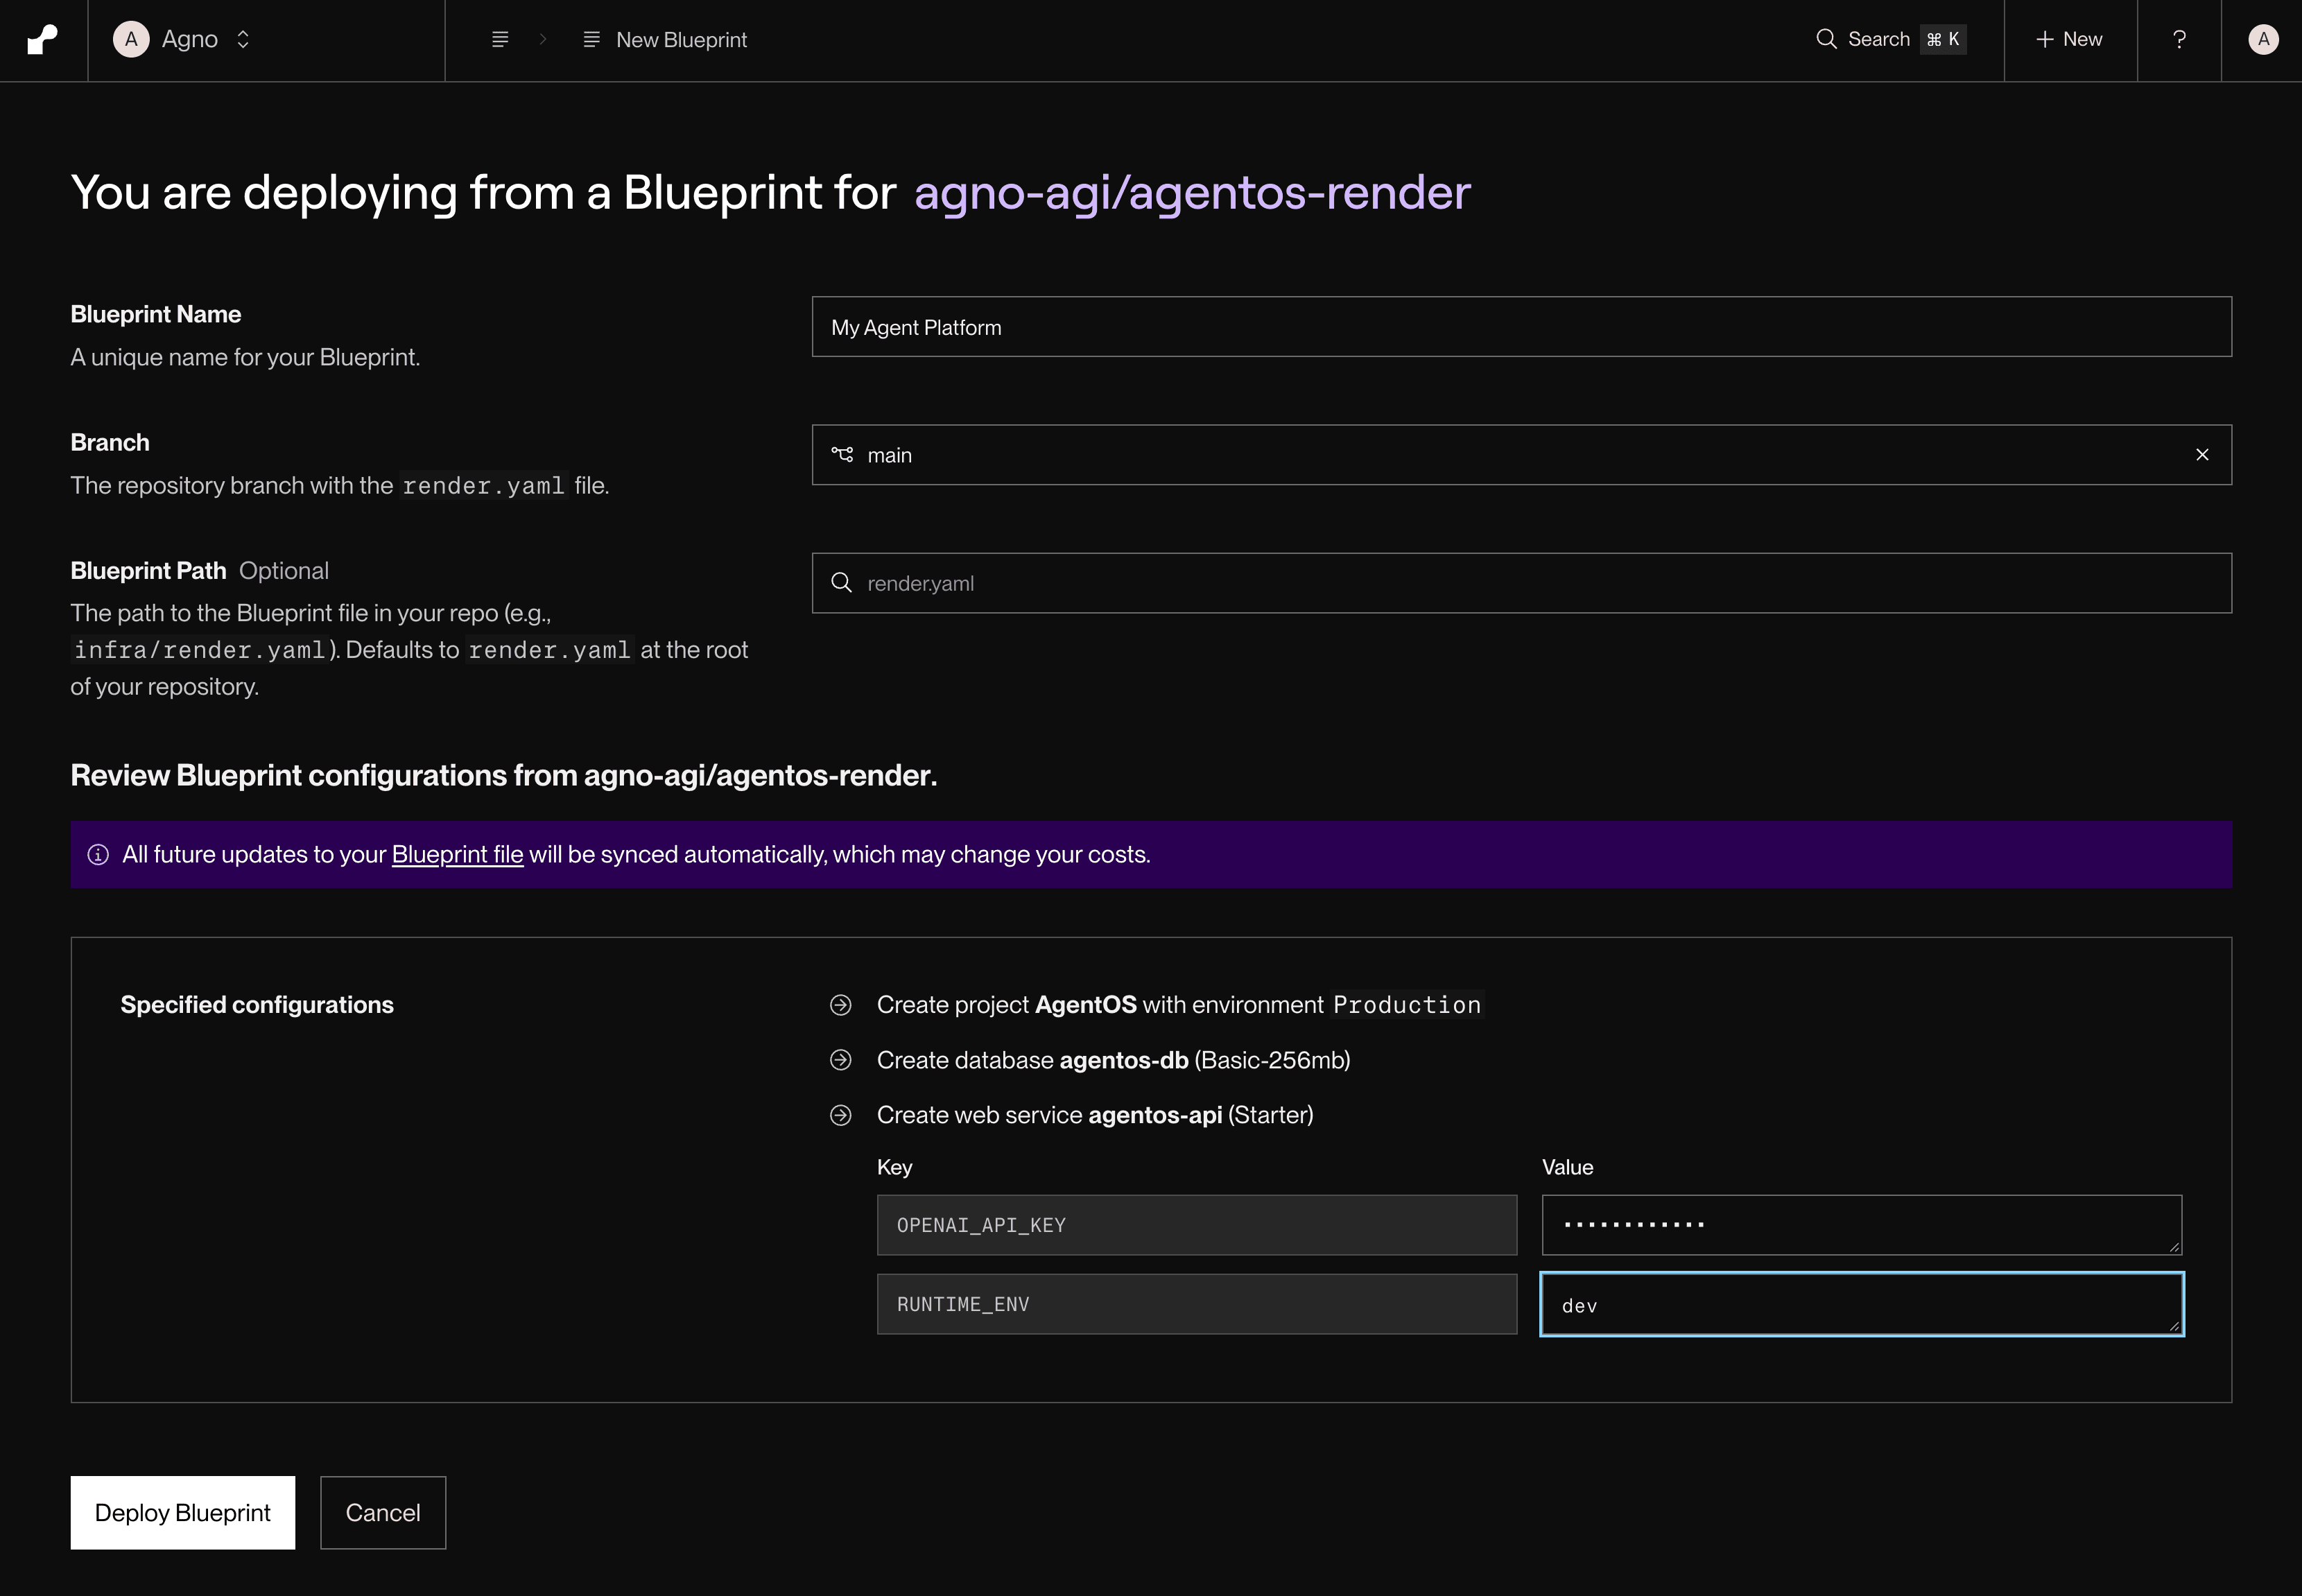
The Render Blueprint creates an AgentOS project with an agentos-api service and a PostgreSQL database.
Connect the UI
- Open your API service in Render and copy its public URL.
- Open os.agno.com and click New AgentOS.
- Select Connect, then choose Live.
- Enter your public Render URL as the Endpoint URL and name your platform Production AgentOS.
- Click Connect.
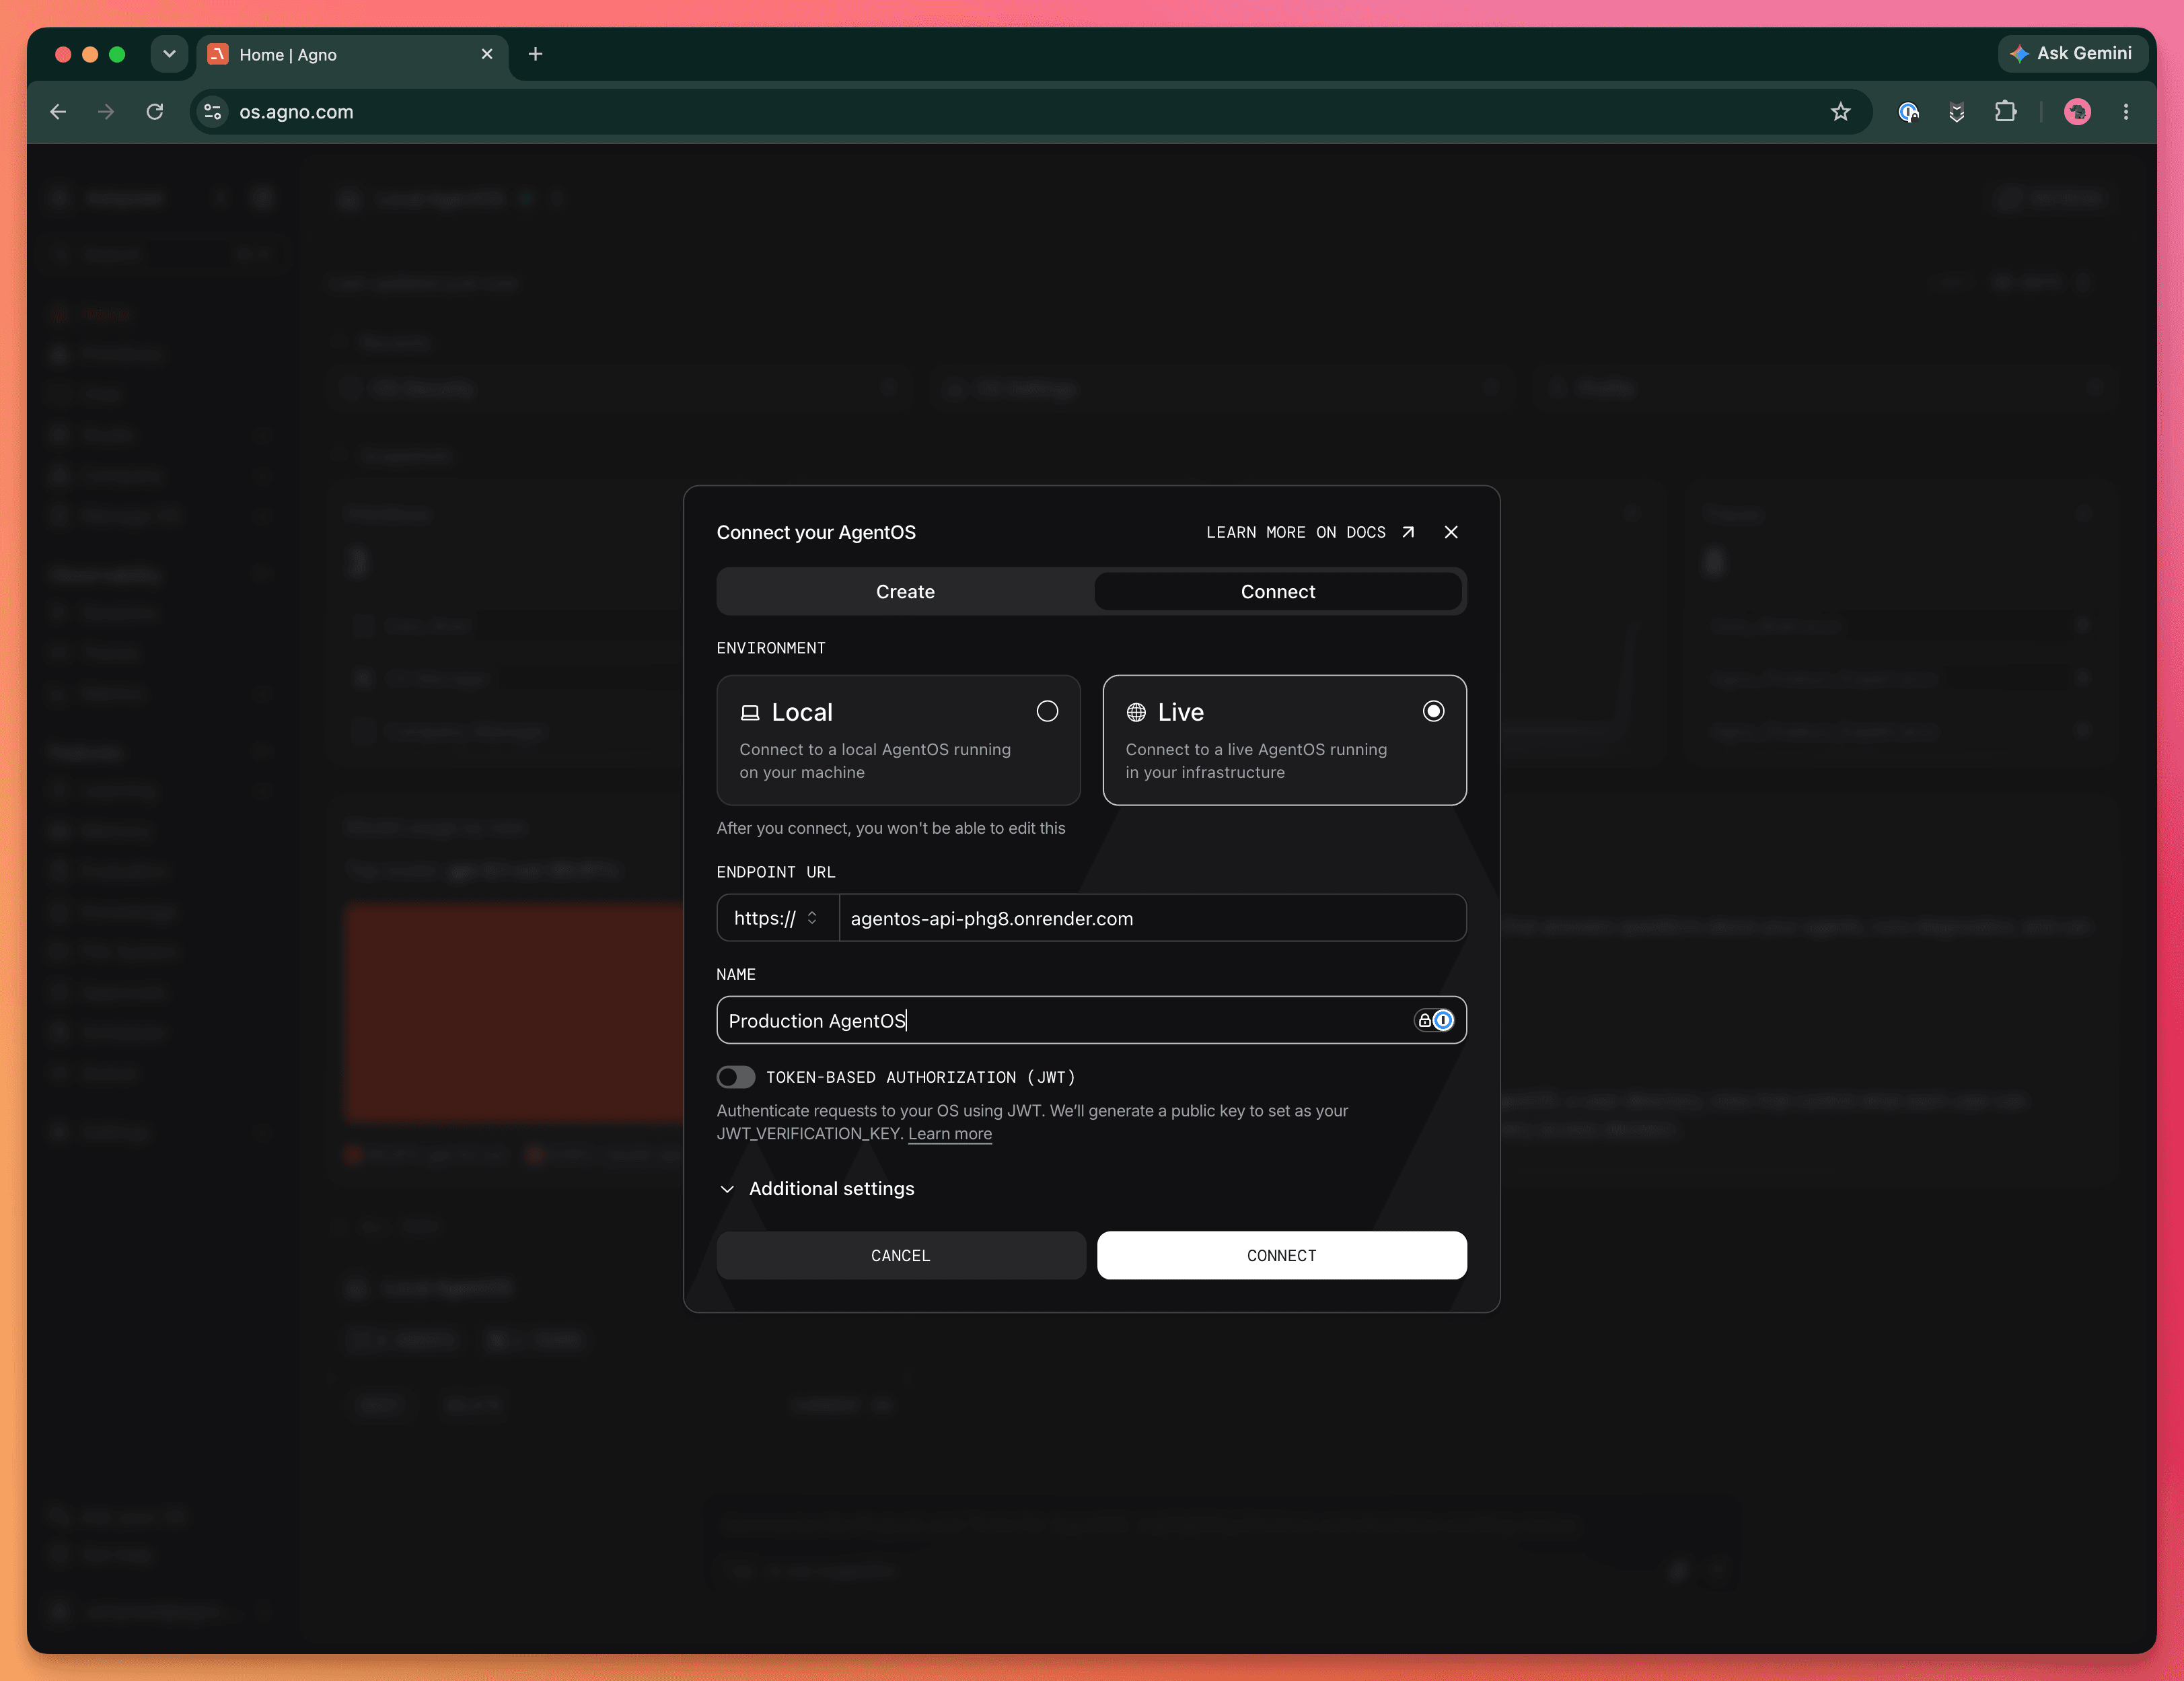
You're now connected to your agent platform. Secure it before adding private data.
Secure your platform
RUNTIME_ENV=dev runs your platform with no security: your deployed platform is publicly reachable without authentication. Anyone with the URL can run agents and access unprotected API endpoints.
Enable JWT authorization so the API verifies each request's identity and permissions. Open the AgentOS UI, open Settings → OS Security, enable Token-Based Authorization (JWT), and copy the public key.
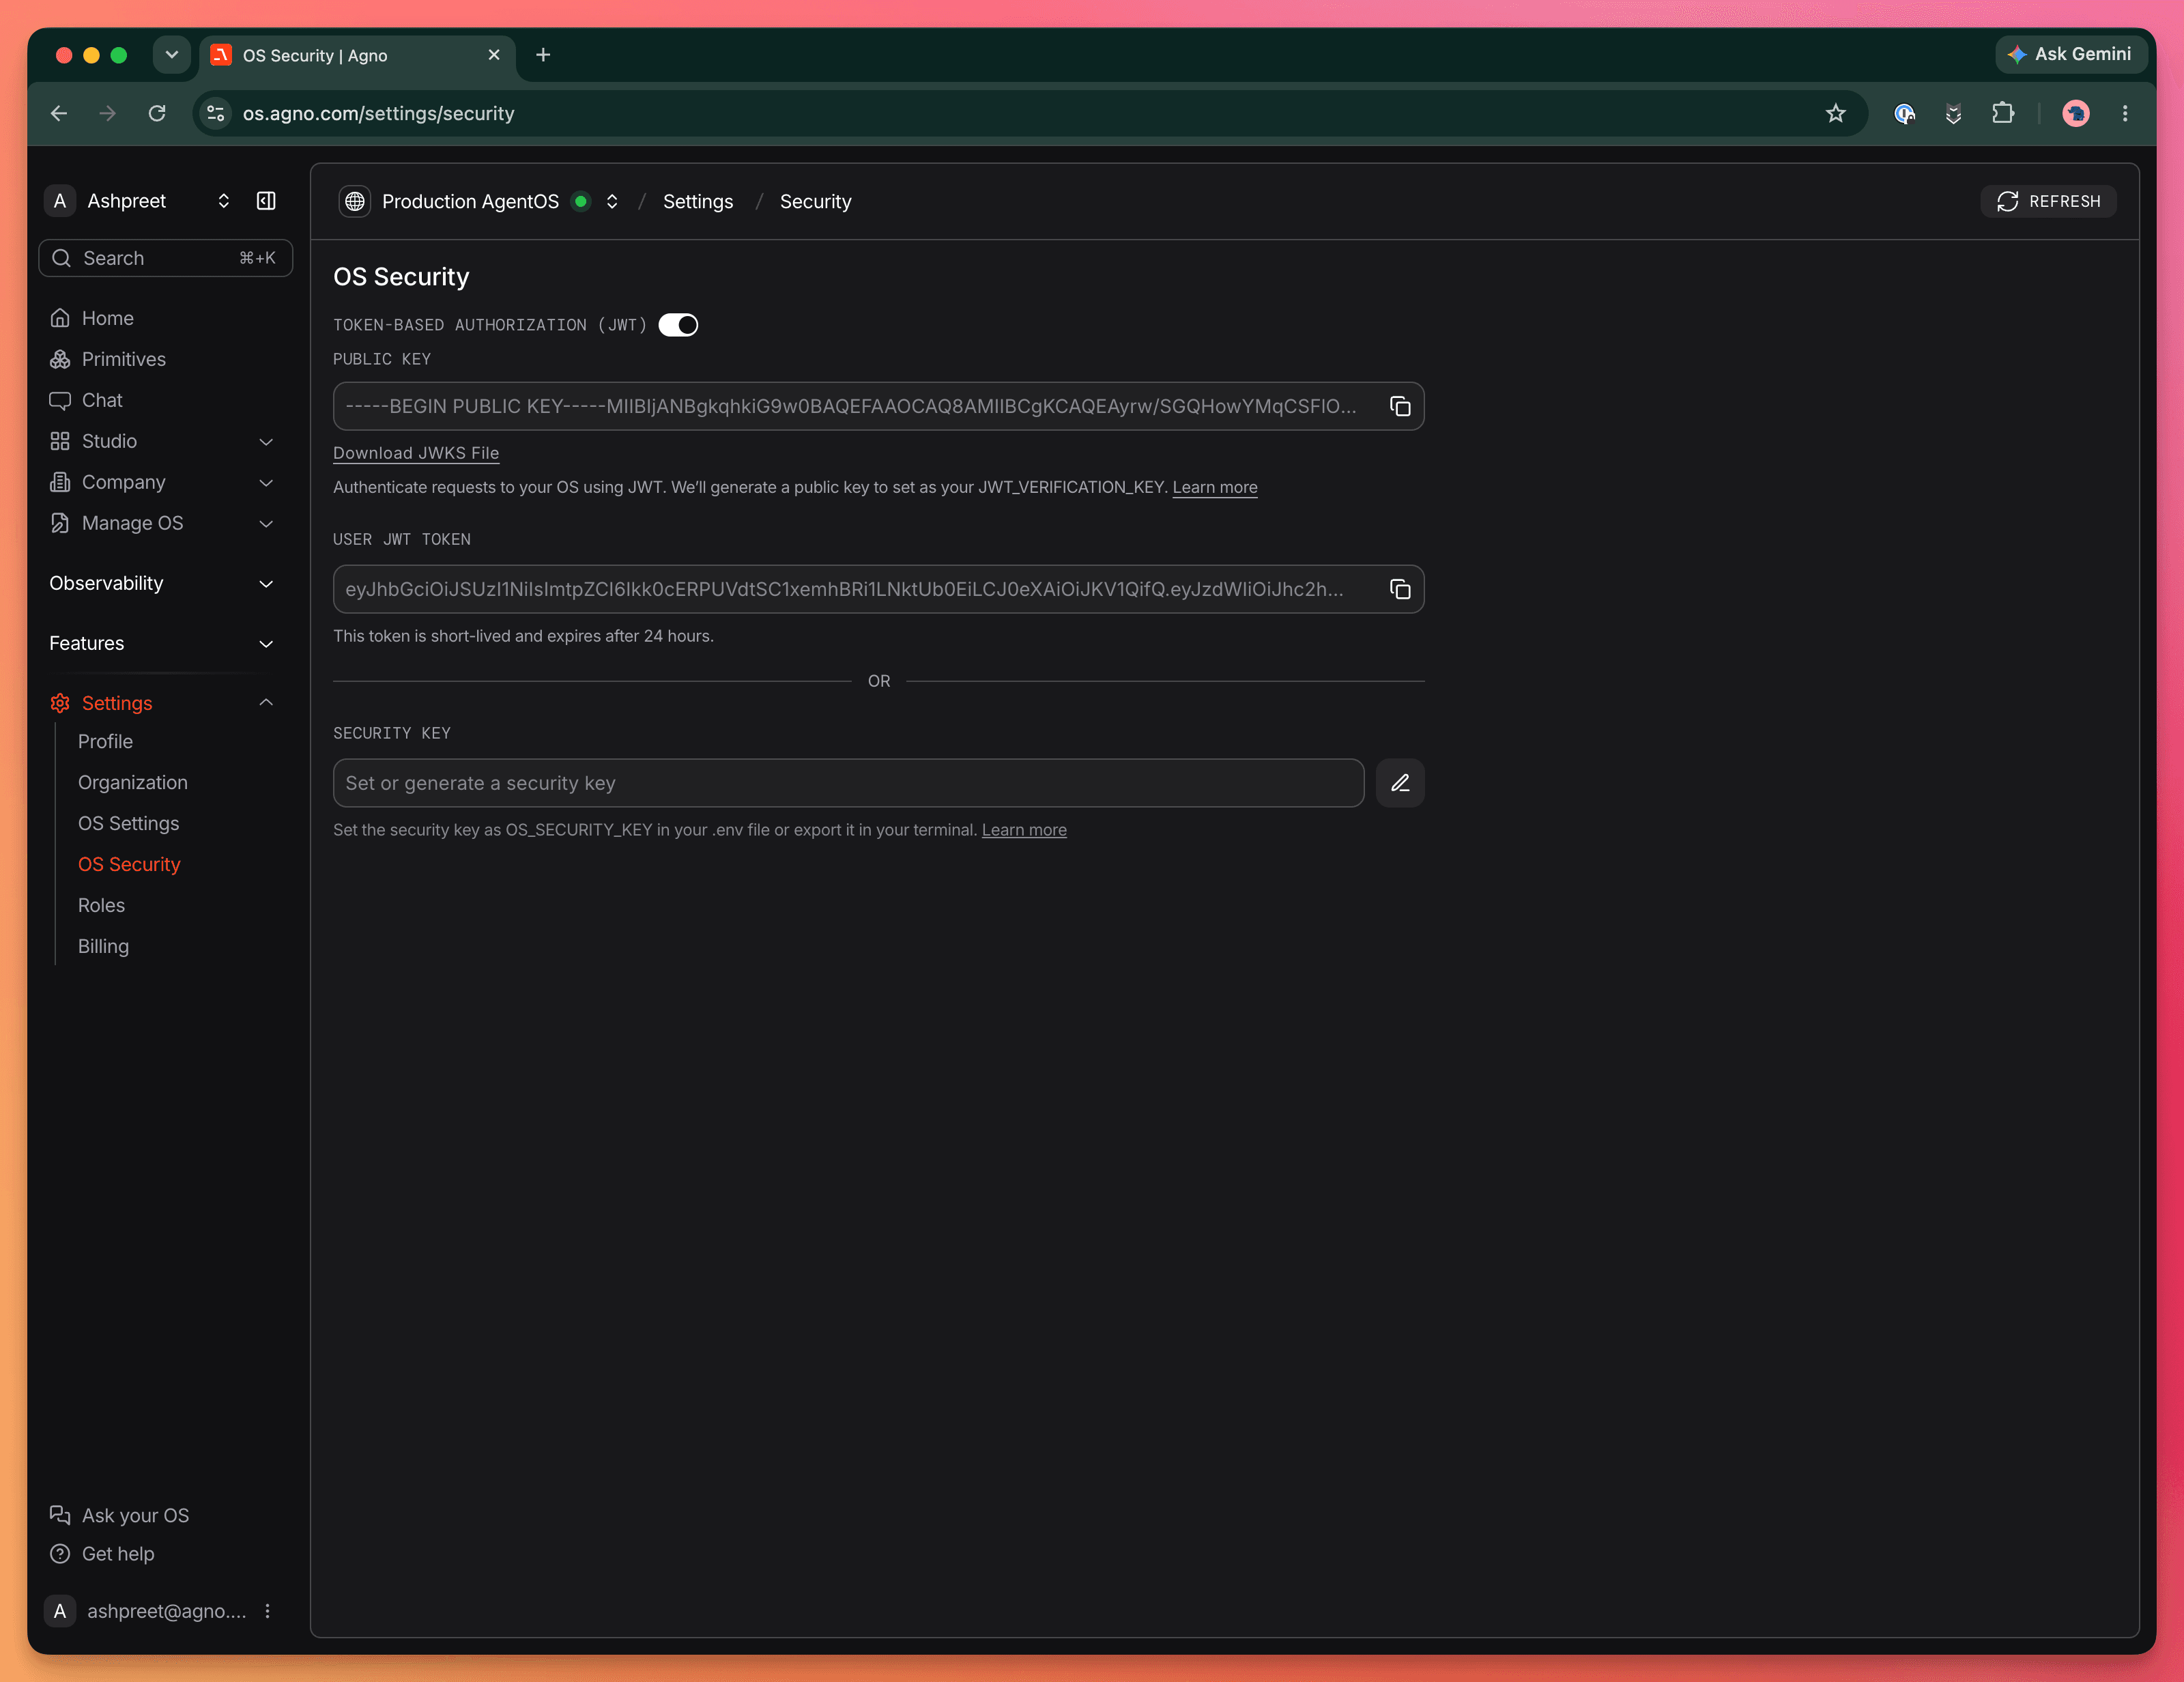
Return to your API service in Render, open Environment, and set these variables:
| Variable | Value |
|---|---|
RUNTIME_ENV | Set to prd to enable authorization. |
AGENTOS_URL | Your public Render URL, without a trailing slash. Copy from the description at the top. |
JWT_VERIFICATION_KEY | The full public key from AgentOS, including the BEGIN PUBLIC KEY and END PUBLIC KEY lines. Preserve line breaks, omit surrounding quotes, and remove any new lines at the end. |
Keep your existing OPENAI_API_KEY and database settings.
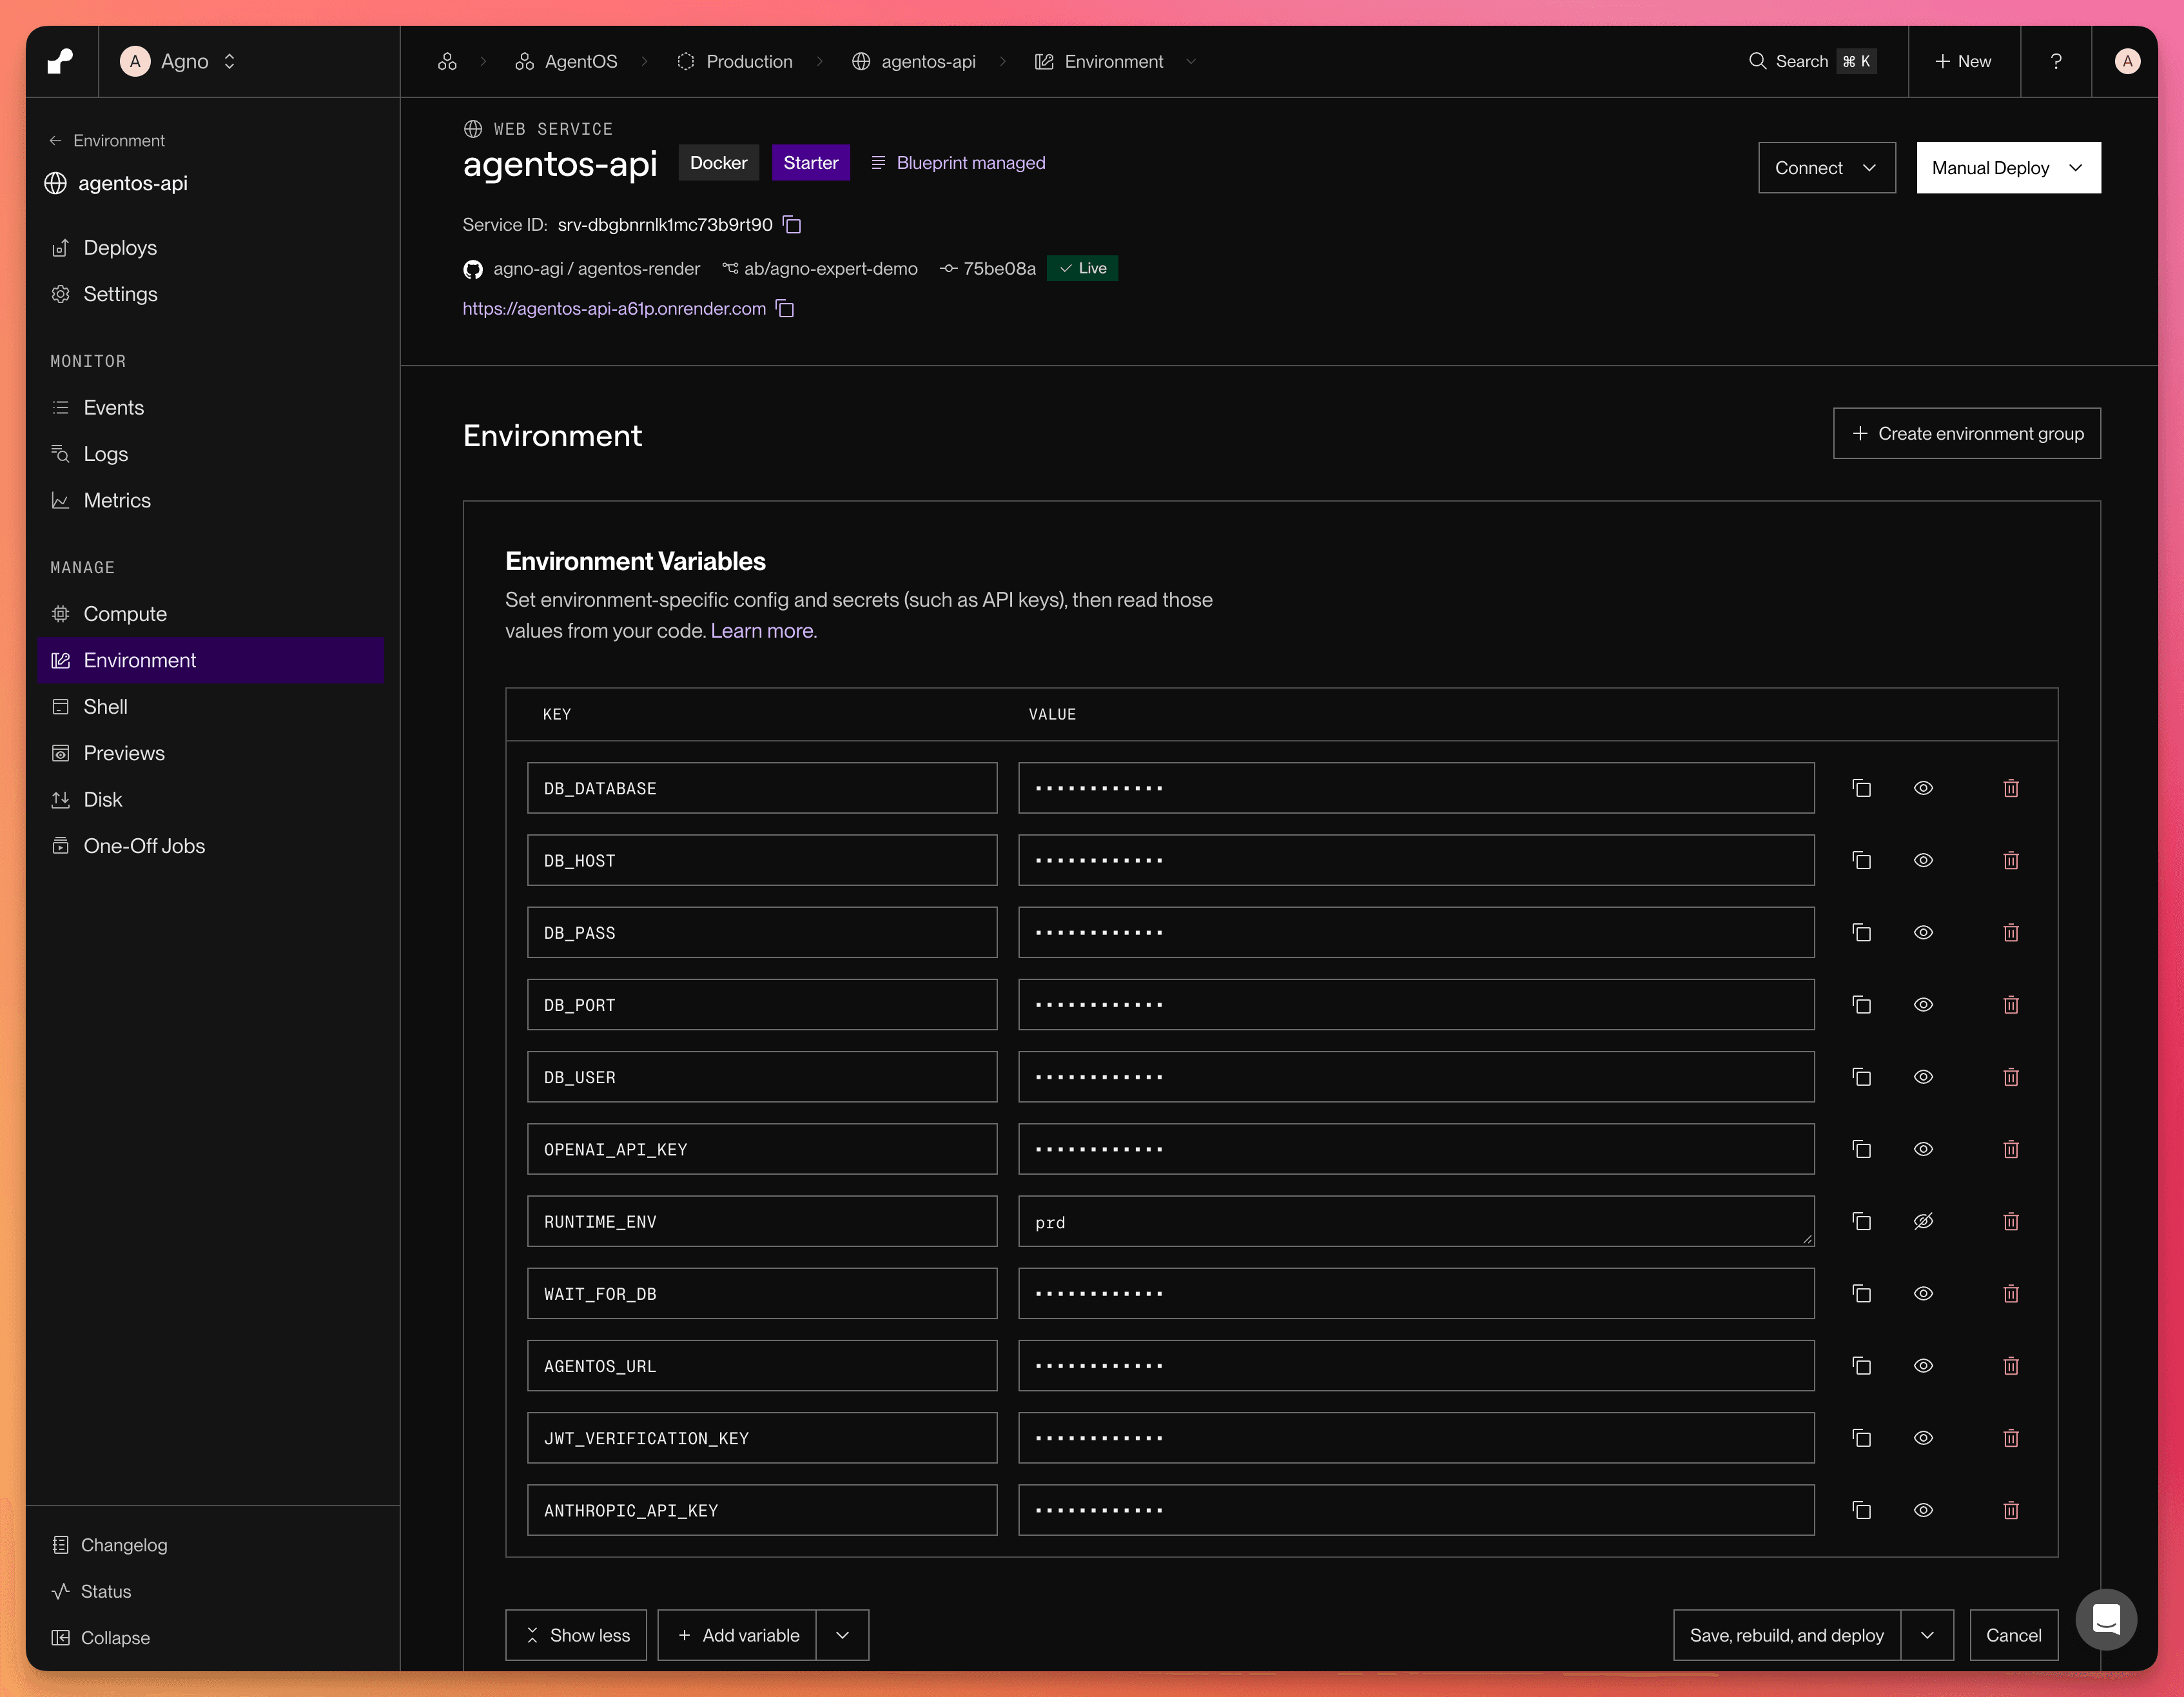
Choose Save, rebuild, and deploy to apply the settings. Check the startup logs and wait for the deployment to go live. Return to AgentOS and confirm you can access your agents. Requests to /agents without a token should now be rejected. /health and /docs remain public.
Run your Daily Brief
Open Daily Brief in your Production AgentOS connection. Ask for today's edition.
Schedule your Daily Brief
Open OS Manager by clicking Ask your OS and tell it to:
Schedule the daily-brief agent to run daily at 8am UTC.
Use "Generate today's edition" as its input.
Reuse a matching schedule if one already exists.

Trigger the schedule now and verify that its run completes.
Open Schedules and confirm. Inspect its sessions and traces when needed.
Updating your platform
Congratulations! Your agent platform is live. As you build, use these steps to update your code, settings, and infrastructure.
| Change | How to apply it |
|---|---|
| Application code | Commit and push to the connected branch. Render will deploy automatically. |
| Production settings | Update the API service's Environment settings and choose Save and deploy. |
| Infrastructure | Update and push render.yaml, then sync the Blueprint. |
After each deployment, check the logs and confirm your agents work in the AgentOS UI.
Next
Learn how to use your agents from the AgentOS UI, your own application, or an MCP client.